Common Radio Restoration Problems & How to Fix Them
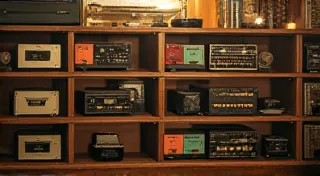
Restoring antique radios is a rewarding hobby, but it often presents unique challenges. This article addresses some of the most common problems encountered during radio restoration, offering practical troubleshooting tips to get your vintage tubes singing again.
1. Weak Reception
Weak or nonexistent reception is a frequent complaint. Here's what to check:
- Antenna Connection: This seems obvious, but a loose or corroded antenna connection is a surprisingly common culprit. Ensure a secure connection to the radio.
- Antenna System: Inspect the antenna itself. Broken wires, damaged coils, or corrosion can significantly reduce signal strength. Consider replacing or repairing the antenna.
- Coil Winding Issues: Coils are critical for signal amplification and tuning. Inspect them for broken or frayed windings. A broken winding will dramatically affect reception. Re-winding may be necessary (a more advanced repair).
- Tuned RF Amplifier (TFA): The TFA is the first stage of amplification. Check for bad tubes, electrolytic capacitors, or resistors within this circuit.
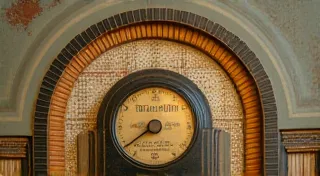
- Alignment: Radio alignment, the process of adjusting coil positions to optimize reception on specific frequencies, often drifts over time. While a complex process, it's often the key to bringing a radio back to full performance. Requires a signal generator and specific knowledge.

2. Hum or Buzzing
A persistent hum or buzzing sound indicates a problem with the power supply or ground circuit. Here's a breakdown:
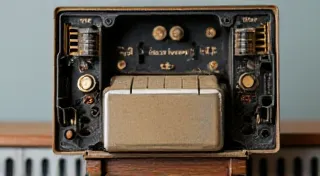
- Power Transformer: A faulty power transformer can produce a loud hum. Testing the transformer with a multimeter can identify shorted or open windings.
- Filter Capacitors: Electrolytic capacitors in the power supply filter the AC voltage to provide a stable DC voltage for the tubes. Dried-out or leaky capacitors are a prime cause of hum. Replacement is crucial.
- Grounding Issues: Poor grounding can introduce noise. Ensure all chassis grounding points are clean and secure.
- Tube Socket Corrosion: Corrosion on tube sockets can introduce noise. Clean the sockets with contact cleaner.
- Dimmer Circuits (if applicable): Some radios have dimmer circuits that can introduce hum if components are failing.
3. Dead Circuits or No Power
If the radio won't power on at all, systematically check the following:
- Power Cord: Check for breaks or cuts in the power cord.
- Fuse: A blown fuse is the simplest and most common cause. Replace with the correct amperage fuse.
- Pilot Light Circuit: Some radios have a pilot light that indicates power. A failed pilot light circuit doesn't necessarily mean the radio isn't working but can mask underlying power issues.
- Voltage Multiplier (if applicable): Some higher-voltage radios use a voltage multiplier circuit. This can be a complex section to troubleshoot.
- Rectifier Tube: A failed rectifier tube will prevent the radio from powering on.
4. Tube Issues
Vacuum tubes are the heart of a tube radio and are prone to failure over time.
- Tube Testing: Use a tube tester to check tube functionality. A simple visual inspection (filaments glowing) isn't sufficient.
- Socket Cleaning: As mentioned earlier, clean tube sockets.
- Tube Matching: Some radios require tubes to be matched for optimal performance.
5. Capacitor Issues
Electrolytic and paper capacitors dry out and fail over time. They're a major source of problems in restored radios. Replacing these capacitors is a common and essential part of the restoration process. Be sure to observe correct polarity for electrolytic capacitors.
Safety First!
Restoring antique radios involves working with potentially lethal voltages. Always discharge capacitors before working on the radio. If you're not comfortable working with high voltages, seek assistance from a qualified technician.